
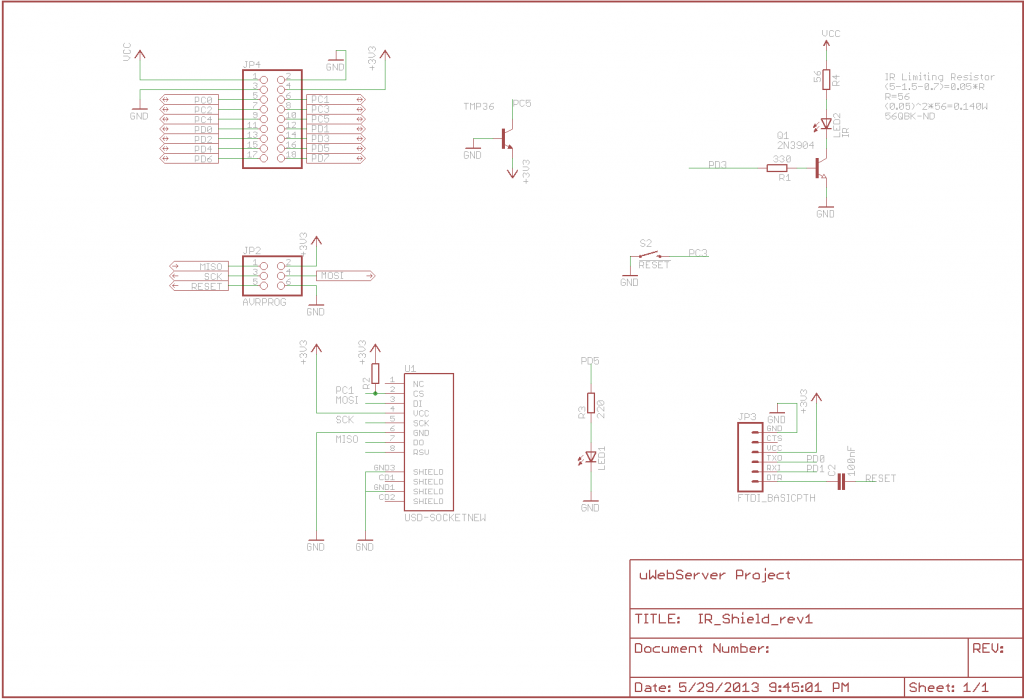
I’ve created a new shield for my micro Internet of Things gateway to allow driving an IR LED, added a micro SD card slot, FTDI pinout for easy programming and a visible status LED. I also added a TMP36 temperature sensor to sense the room temperature:
The idea is to plug it on-top the uIOT and re-vamp my Daikin Internet controller.
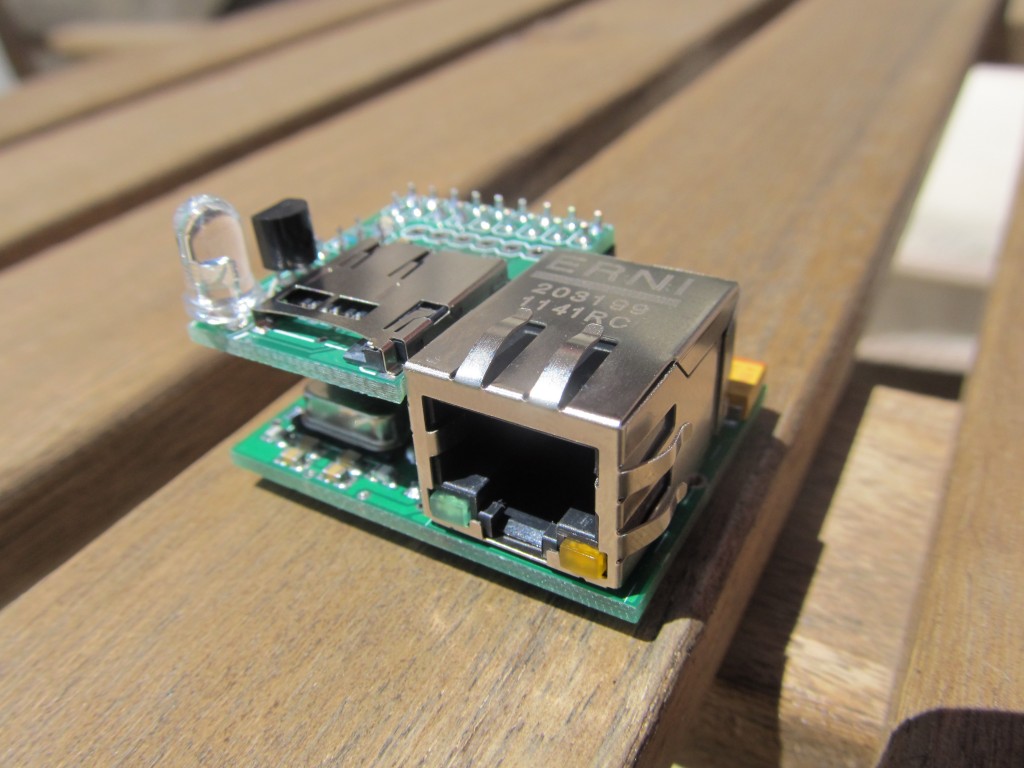
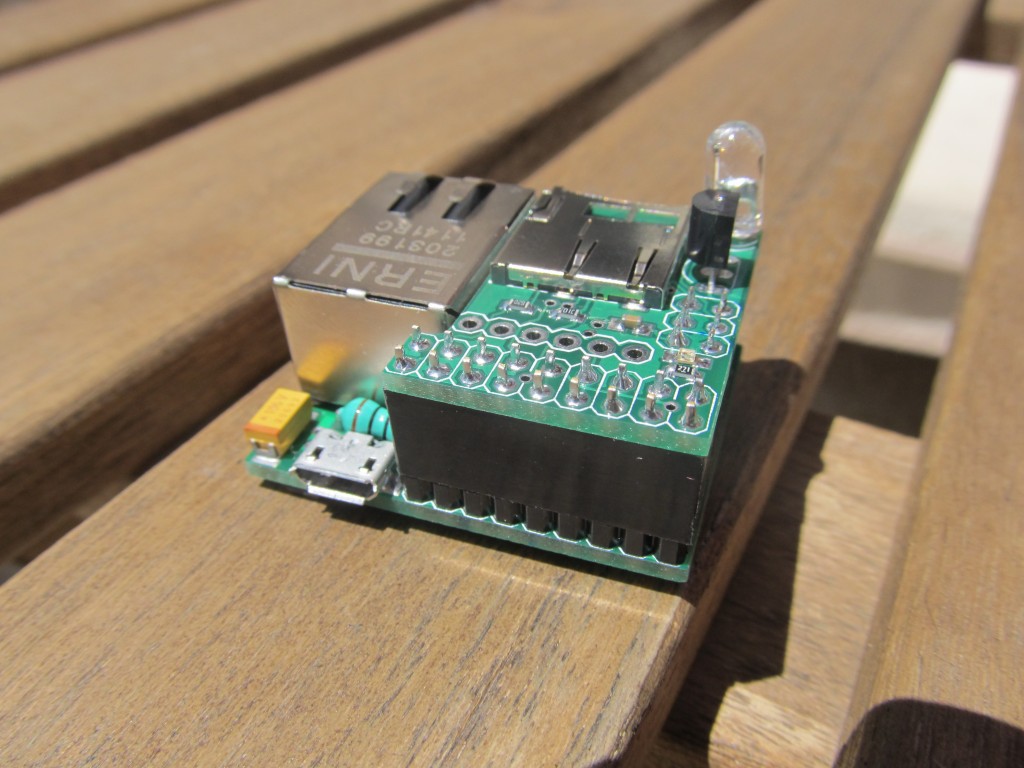
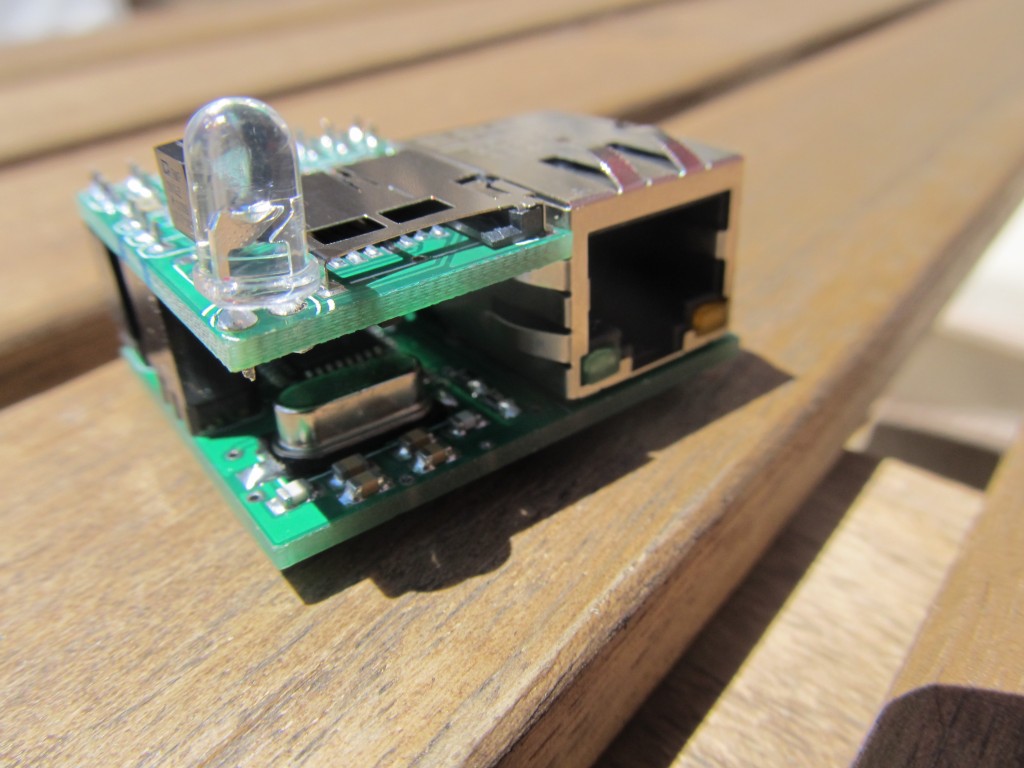
The final product now looks like this
The Daikin Internet remote control unit emulates the ARC433** IR remote control that many modern Daikin split air conditioners use. It allows the user to remotely control the AC over the Internet, using the in-built web server, which you can access using your mobile phone, tablet or laptop from anywhere in the world.
The unit includes a microSD card slot for firmware updates. Should there be newer firmware version, the user can save it to a SD card and the unit will automatically be re-flashed with it. This is possible due to the 2boots project I worked on earlier.
Board dimensions are width 38mm depth 20mm and height 16mm i.e. a quarter of my original project.
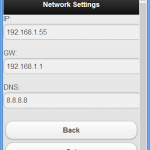
For the advanced use, JSON status string is available if the unit is queried at the default IP address, http://192.168.1.55/json it will return:
{“state”:”0″,”mode”:”4″,”temp”:”21″,”fan”:”176″,”aux”:”0″,”roomt”:”22.9″}
State has values 0 or 1 meaning off/on
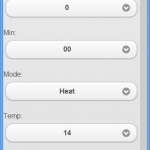
Mode has meaning
3 = Cool
4 = Heat
0 = AUTO
2 = DRY
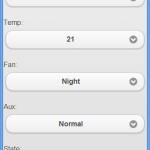
Temp shows the set temperature
Fan shows the fan speed and has the following meanings:
176=Night mode
160=Auto
48=Speed 1
80=Speed 2
112=Speed 3
Aux shows the aux mode i.e.
0=Normal
1=Powerful
16=Silent
Roomt is the room temperature in degrees Celsius detected by the on-board TMP36 temperature sensor
JSON can be used for automation scripts, for example I use a PHP script to check outside temperature and decide on weather I need heating/cooling. Also, based on other criteria I may increase/decrease the set temperature during nights for better efficiency.
The unit can take remote commands using query string, for example
http://192.168.1.55/r?d=4&t=21&f=176&a=0&s=1
will set the AC in heat mode (see above for details), temperature 21, fan speed to ‘night mode’, normal mode and state ON.
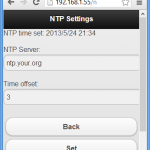
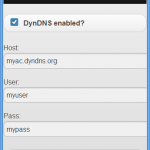
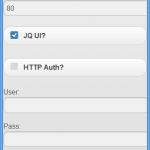
Some pictures of the UI:
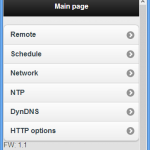
Complete user manual is available here
You can buy one in the shop
Hi,
if I power this controller through a micro-usb cable plug into Apple usb power adaptor which provide DC 5V, 1A will it be too much? I’ve read that the uIoT board alone can take 3.3V.
Thanks
The microUSB is intended for powering the board, the 5V will be regulated to 3.3V; Go ahead and plug it.
can you develop for other air conditioners? we need that!
Probably, but I need physical access to a remote control unit and many hours of work to decode the protocol.
Is it possible to make a version that works with the Winodes? and Nanode RF?
I have 3 units that I would like to control remotely but dont have ethernet in all rooms. Also the Winodes are battery powered which will completely eliminate the need for any cabling.
It is possible, given someone has the time and enthusiasm to do it 🙂
Ethernet is not a problem since you can use access point (WIFI to Ethernet bridge)
Martin, is there a way we may be able to discuss this off this news group? Directly on mail?
I may have the enthusiasm to do it – but since i know nothing about the Winodes or Nanodes RF I may need to get some pointers from you first.
Martin,
Can I use the code on an Arduino Uno (or Mega, or any Arduino board)? I am not into programming and I will be glad if you give me a hint on what should be adjusted. Having difficulties compiling the code so far (EtherCard.h:25: error: expected class-name before ‘,’ token).
Any help will be appreciated.
The code was specifically designed to run on Nanode, the errors you are seeing are because it is looking for the Ethernet connectivity. You could adapt the code to run on Arduino without Ethernet connectivity and just control it from your computer; that should not be so hard to do.
Thanks for your prompt response. If I use Arduino Uno (or nano) which also uses atmega328 and the 28j60 ethernet module connected to it, may I achieve the full functionality by adjusting the code? At the end I want to control it over the Internet. What do you think?
It should work; You should use a transistor to drive the IR LED for better range (see the schematics)
Like most things that work well I hardly notice how incredibly handy this device is and how seamlessly it has become part of my house. Than you for the effort you put into its design.
Thanks for the feedback Tom, I am glad that you liked it.
Pingback: Presence detection using phone’s WiFi and Node-RED | Martin's corner on the web