[edit] This project is now available for sale in the store
I figured my cheap 1.8″ TFT display is useless on an Arduino as it pretty much eats the available memory (20K for simple sketches), so I decided to try it on my Raspberry Pi. The most appropriate way to do so is to use Kamal’s modified kernel with ST7735R support. This is the first time I ever do kernel compilation, took few tries before I got it right, the best instructions I found are these. It is important to remain on kernel 3.2.27+, so do not upgrade (see Kamal’s note in the comments sections). Read all the comments carefully; I used menuconfig to edit the .config file as one comment suggested – much more visual for beginners. I set the SPI to 8Mhz so it runs faster. I also used a MINI4x6 font so more characters would fit:
Device Drivers --->
  Graphics support --->
    Console display driver support  --->
      <*> Framebuffer Console support
      [ ]   Framebuffer Console Rotation
      [*] Select compiled-in fonts
      [ ]   VGA 8x8 font
      [ ]   VGA 8x16 font
      [ ]   Mac console 6x11 font (not supported by all drivers)
      [ ]   console 7x14 font (not supported by all drivers)
      [ ]   Pearl (old m68k) console 8x8 font
      [ ]   Acorn console 8x8 font
      [*]   Mini 4x6 font
      [ ] Sparc console 8x16 font
      [ ] Sparc console 12x22 font (not supported by all drivers)
      [ ] console 10x18 font (not supported by all drivers)
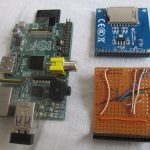
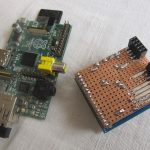
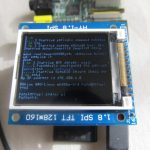
The LCD I have is not an original Adafruit, nor SainSmart but rather cheap clone, $5 on ebay, still using the same chip. Pins are different from the above mentioned products too. I made a vero-board breakout:
- Spaghetti style
- The breakout took couple tries to get right; Powered by the 5V line
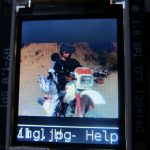
- sudo fbi -T 1 -a -d /dev/fb1 file
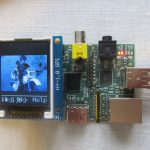
- Overall dimensions
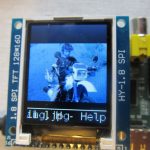
The images are quite bluish, I guess I need to do some gamma correction. Please tip me off if you have any idea on how to fix that. Pictured above is my son, looking like Avatar due to this issue.
UPDATE: The “Avatar” effect is overcome by applying a small fix to the drivers, as per the comments in the setup link above:
..you have to edit your local st7735fb.c in your github clone folder.
{ ST7735_CMD, ST7735_MADCTL},
{ ST7735_DATA, 0xc8}, //this make 0xc0
this was because the display (HY 1.8 SPI TFT haydooz..cheapest on ebay) is SRGB
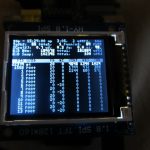
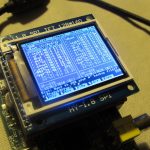
The screen runs as an additional framebuffer (/dev/fb1), independent of the HDMI/RCA, thus is perfect for a miniature status display. I am running fbterm on it. Here is my /boot/cmdline.txt
dwc_otg.lpm_enable=0 console=tty1 root=/dev/mmcblk0p2 rootfstype=ext4 elevator=deadline rootwait fbcon=map:10 fbcon=rotate:1 fbcon=font:MINI4x6
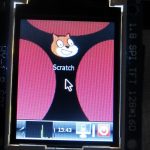
To use X on that display, you may need to add the following to /etc/X11/xorg.conf
Section "Device"
 Identifier "uga"
 driver "fbdev"
 Option "fbdev" "/dev/fb1"
 Option "ShadowFB" "off"
EndSection
Section "Monitor"
 Identifier "monitor"
EndSection
Section "Screen"
 Identifier "screen"
 Device "uga"
 Monitor "monitor"
EndSection
Section "ServerLayout"
 Identifier "default"
 Screen 0 "screen" 0 0
EndSection
- Fixed “Avatar” effect
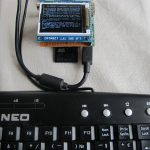
- Keyboard attached..
- X running
- Logging in
- Midnight Commander
Overall, quite fun project, I will explore that area further.

Really nice build and write-up, Martin!
In the “Where was this yesterday!?” category… I’ve just added a new CONFIG option to the st7735fb driver to handle the reversed RGB situation (it implements the same 0xc8 –> 0xc0 hack that you applied manually):
ST7735 panel has reversed RGB? (FB_ST7735_RGB_ORDER_REVERSED)
I’ve also ported the driver to the 3.6.y kernel, and updated the references on my project page accordingly.
Thanks for sharing your great work with us!
Pingback: Display for my Raspberry Pi | Martin's corner on the web
Hi Martin,
I like this a lot what a cool little project.
Do you have the pin mappings that you did on your breakout board for the LCD module to the Pi?
Cheers
Ad
Hi,
LCD pin: GND-VCC-NC-NC-NC-RESET-A0-SDA-SCK-CS-SD/SCK-SD/MISO-SD/MOSI-SD/CS-LED+/LED-
Raspberry Pi: GND-5V-NC-NC-NC-GPIO25-GPIO24-GPIO10-GPIO11-GPIO8-NC-NC-NC-NC-5V-GND
(http://elinux.org/RPi_Low-level_peripherals)
You can see it on the spaghetti style board I made too
Pingback: Using my 1.8 TFT as a Raspberry Pi status display | Martin's corner on the web
This looks good.
Can the TFT be put on a cable and to move it further away from the RPi?
If yes – how far away do you think it could go without needing additional power / circuitry?
I have tested with jumper wires at about 15cm; I think capacitance issues will start kicking in at some point, but that is a subject to experimenting. Using lower SPI clock may help work around this at the cost of slower screen refreshes.
Pingback: Raspberry Pi TFT board | Martin's corner on the web
Pingback: Thomas Höser » 1.8″ TFT LCD display on Raspberry Pi
Hi, do you think I could run a fullscreen browser on this device (it can be done with html5)? I would like to build a web app that runs on this small display. I finished the display connection 2 months ago but I still didn’t find time to mess with linux to run this display. Can I compile different linux than Raspbian to run with this? Say.. I’m currently running PiBang Linux because the UI is faster than in Raspbian and it’s got html5 browser included.. (that’s not really a reason is it?)… I’m a little lost…
You can probably squeeze in some useful UI/application on a screen 128×160 pixels, I personally used pygame to draw my own screens.
Regarding using different distribution – it can probably be done, but I haven’t even tried.
Hi,
I was wondering if you have tried this kernel along with this LCD module?
https://github.com/notro/fbtft/wiki
Thanks in advance,
Hi,
looks interesting, thanks to the pointer. I will have to check it out.
Martin
Great wok, unfortunately I just saw it after I finished my Shield. Did you manage to use this SD adapter also included on the board to use it wih SPI?
Greetings
Arne
I didn’t really need the SD,I know that is possible, but it isn’t very straight forward
Pingback: Raspberry Pi kernel with Frame Buffer TFT support | Martin's corner on the web
Hi Martin,
I’ve also bought such a screen, plan to connect it to my pi.
I wonder if I use pygame to write program, must I login X window first?
pygame should be set to fullscreen?
How much is the FPS and CPU load?
I just want to show some pictures and simple motion via button.
Thanks in advance.
Bony
No need for X to run, pygame has direct access. I haven’t tested FPS/CPU load, but it seems pretty snappy. You will like it.
Hi,
I’ve found an pygame example on raspberrypi forum, that is useful.
Thanks for your nice job, I’ll try it.
Bony