
Installing a rooftop solar panel system at our house was not a simple decision. In Bulgaria, household consumers have access to some of the lowest electricity prices in the EU, making it challenging to financially justify the cost of a solar panel installation. The state actively discourages surplus production feed-in through a series of administrative obstacles [ref: 1, 2, 3] and low feed-in tariffs, resulting in a loss of potential cost-offsetting income. Without the ability to feed excess production back into the grid for profit, additional (and expensive) measures must be taken to maximize self-consumption or store it for later use in a battery, further diminishing the financial viability of the project. On top of all that, the high global demand for new solar panel installations has led to increased prices for components and extended delivery times over the last year.
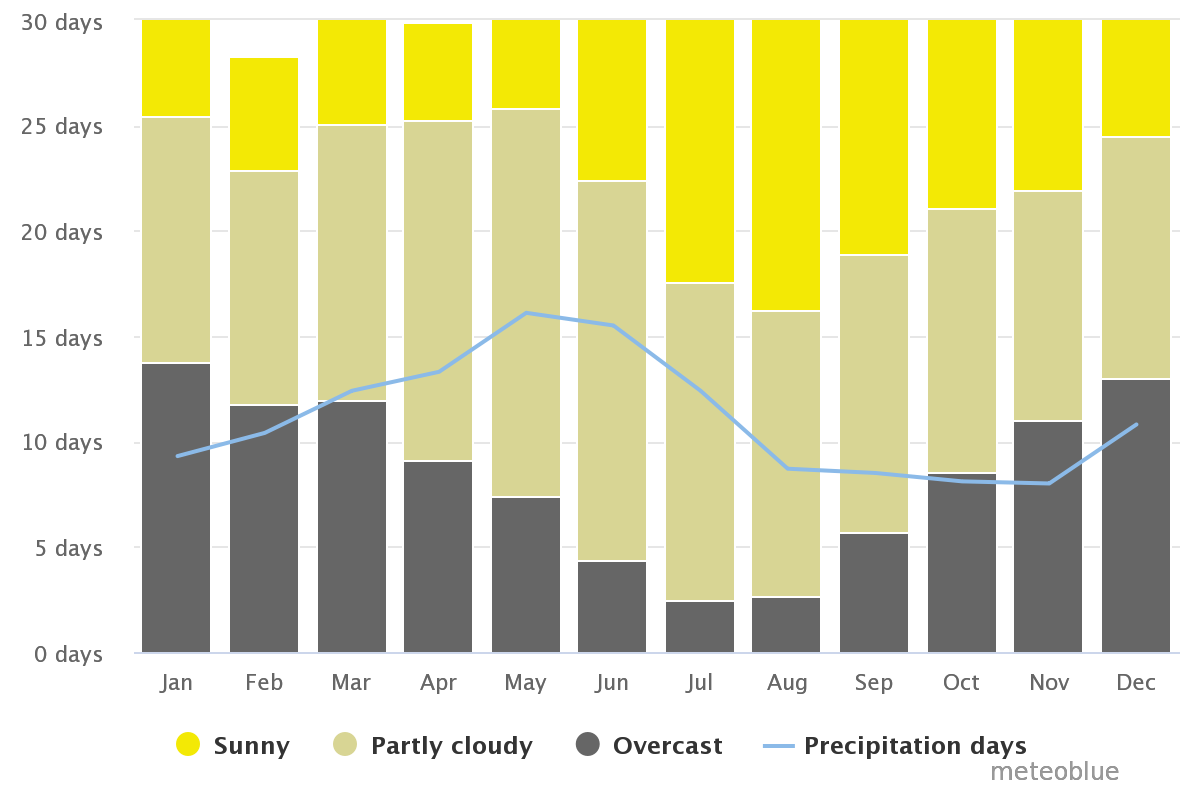
Evaluating the feasibility of a rooftop solar panel installation, the average annual sunlight in Sofia has the potential to generate an estimated 7.6 MWh of energy per year for our available roof area. It boasts optimal conditions, including a south-facing orientation, no shading, and space for at least 20 panels, making such an installation likely to produce high energy output.
The low electricity costs in Bulgaria are most likely about to come to an end as the country has committed to transitioning household consumers out of the regulated electricity market by 2025, after which electricity costs are expected to be higher by a factor. It has been negotiated with the EU that coal-powered electric plants are phased out, possibly putting the country in the position of needing to import electricity – a drastic shift from being a large producer. We do not own an EV at the moment but plan to eventually purchase one. Charging it at home with excess PV production will also be a material cost-saving. Given the above, and the clear understanding that we need to transition to a greener and more sustainable future, we decided to still go ahead with the rooftop PV installation regardless of the project’s ROI not making any financial sense for the moment.
As previously mentioned, exporting excess PV production in Bulgaria is currently not a viable option. Therefore, the plan is to focus on maximizing self-consumption by configuring the inverter for zero feed-in. To accomplish this, the inverter must be capable of monitoring power flow at the feed-in point using a smart meter and regulating the PV’s maximum power point tracking (MPPT) to match the house’s power demand. Most modern inverters have this feature. Additionally, I require that the inverter supports both “grid-tie” and “island” modes to ensure the ability to power the home during a grid outage. Hybrid inverters typically require a battery for island mode operation, however, I would prefer that this function is supported without the need for a battery, even if only a PV power socket is available. Switching between “grid-tie” and “island” mode requires a physical disconnection from the grid during outages, with reconnection upon grid availability. The inverter should be able to control this process in an automated manner. Furthermore, I require that the inverter has an open application programming interface (API) for integration into home automation systems.

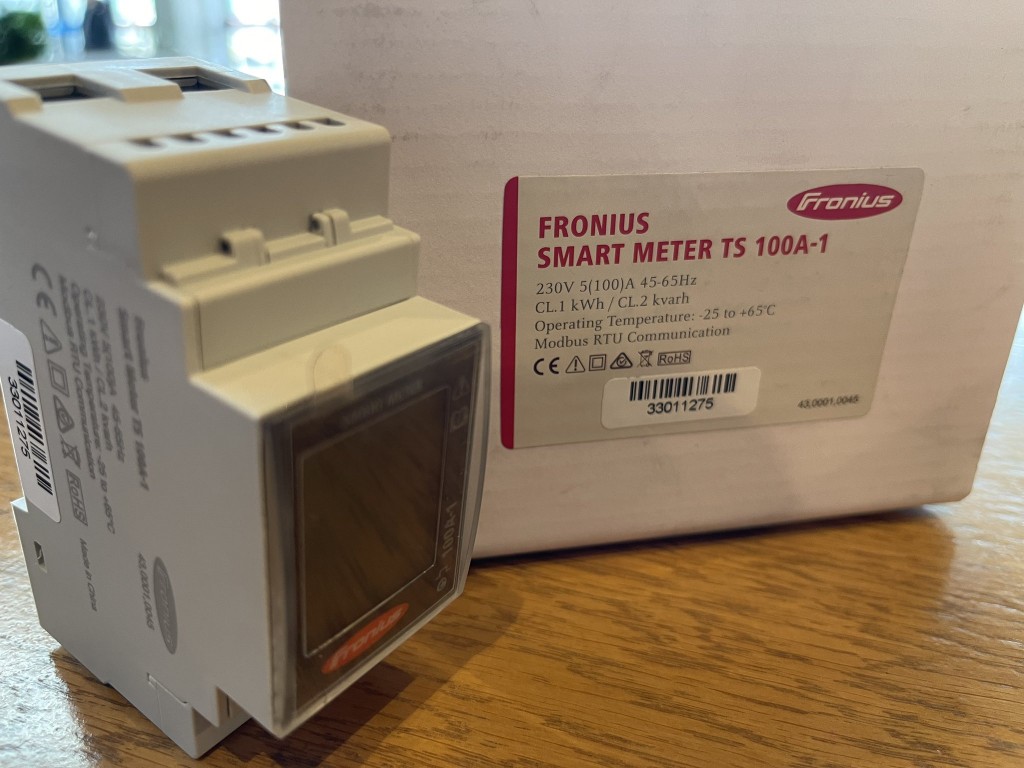
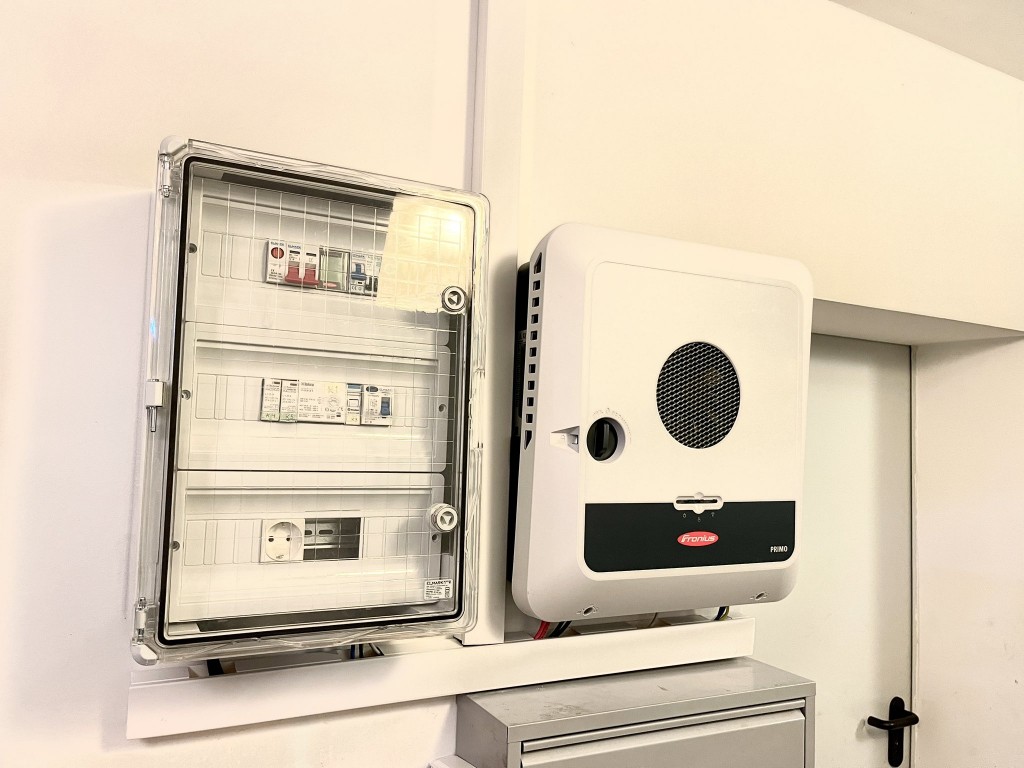
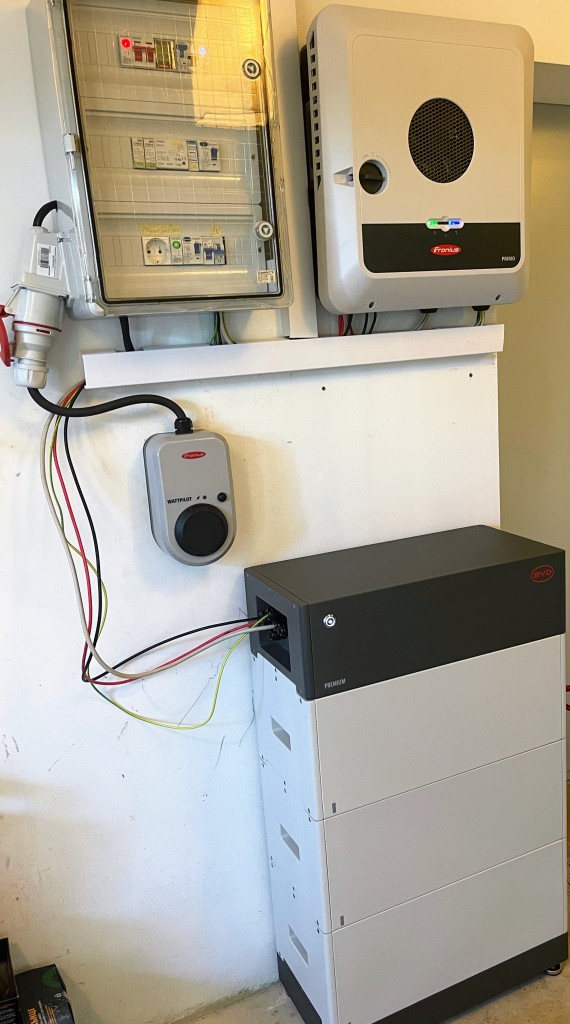
I chose the Fronius GEN24 Primo 6.0 Plus for the inverter, as it satisfies the above-described requirements and is from a reputable EU-based manufacturer. I purchased an extended warranty for the inverter, and it is now covered until 06.2029. A Fronius Smart Meter TS 100A-1 will be installed at the feed-in point, it is a required component for a zero feed-in setup like mine. I added a Fronius surge protection device to the DC side it is a surge protection device type 1+2 for direct and indirect lightning strikes and can be retrofitted inside the inverter.


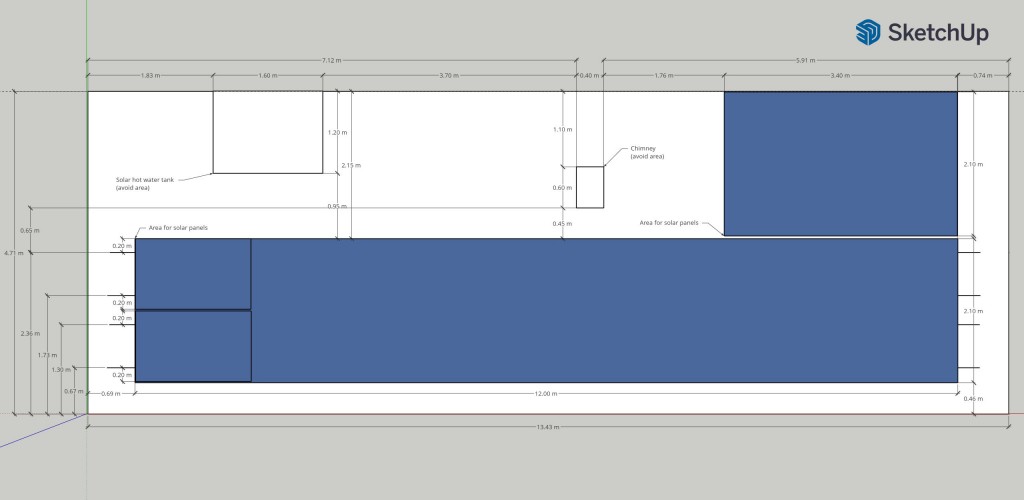
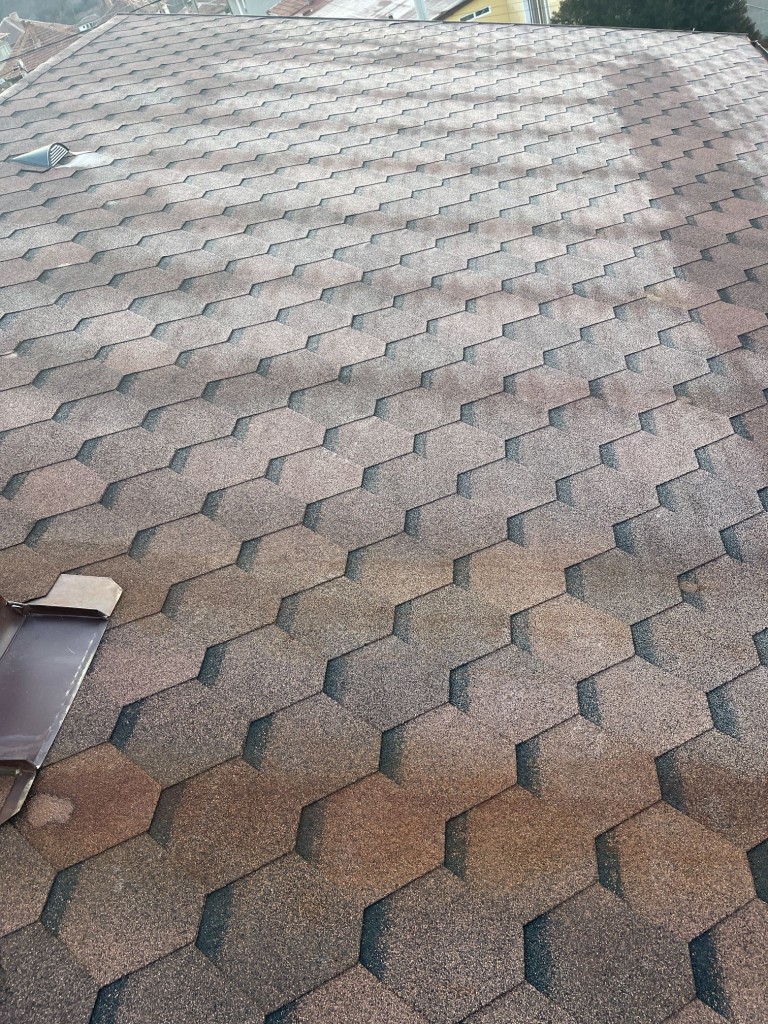
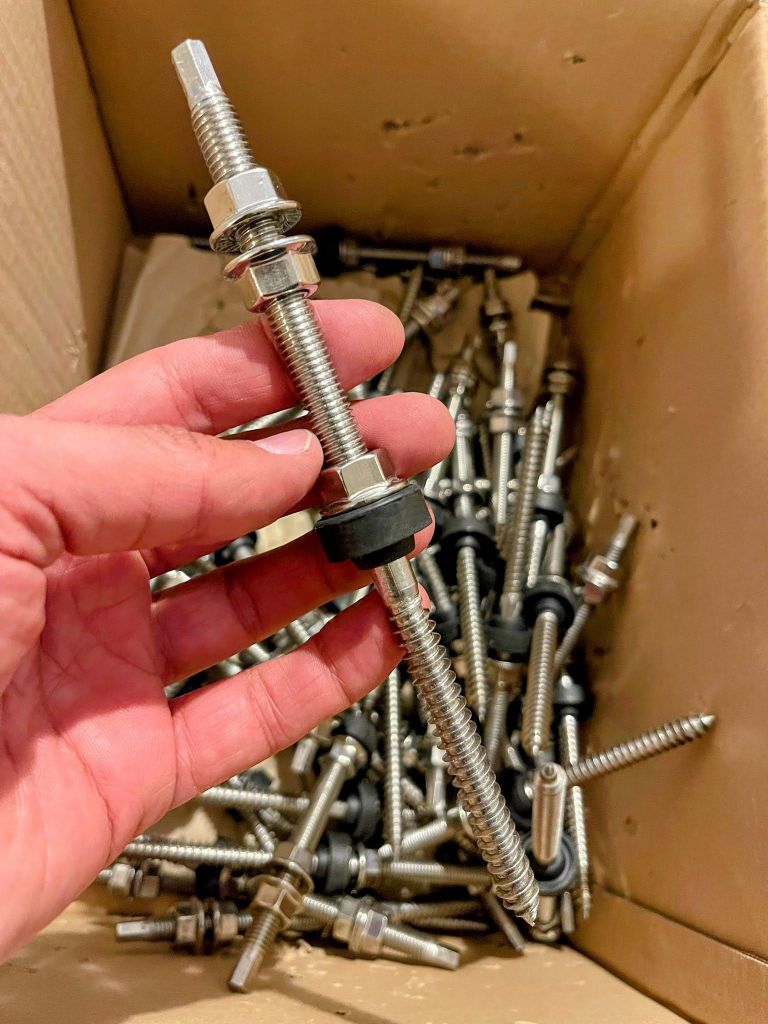
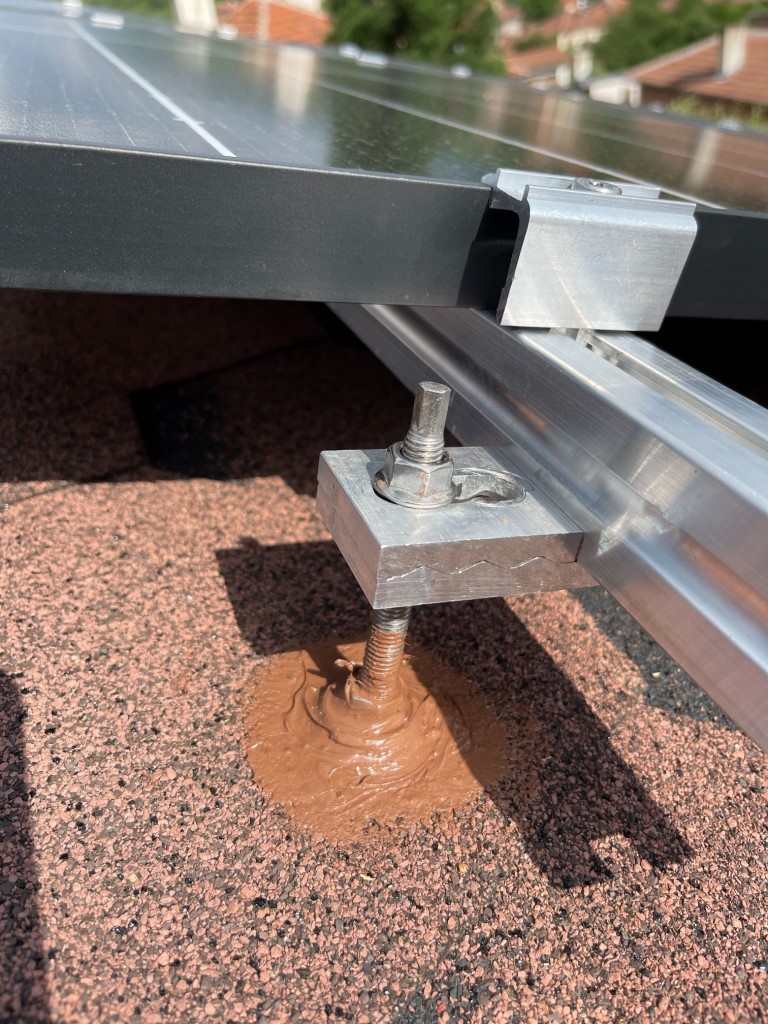
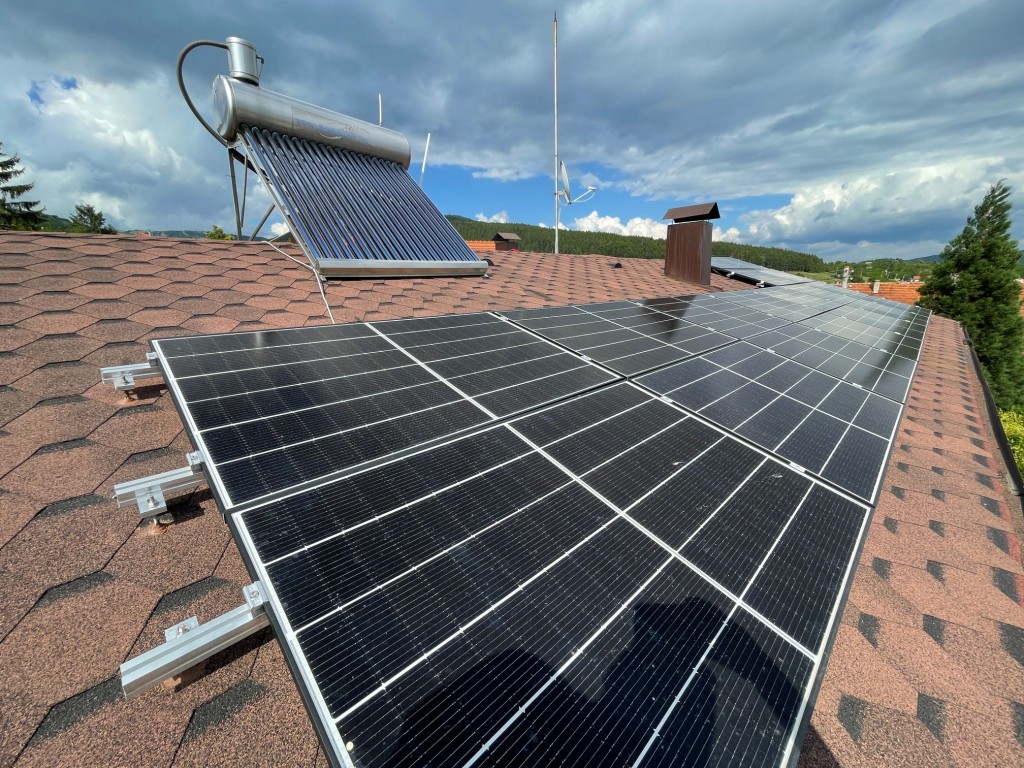
I ended up purchasing 18 pcs Q CELLS Q.PEAK DUO G9 Solar 355W panels for a total of 6.4kWp. Those are split into two strings, 9 panels each, and will be mounted to the south-facing roof slope. The inclination of the roof is only 20 degrees, and that is not ideal for the latitude. I still prefer the aesthetically pleasing setup rather than mounting the panels on stands. I had to chart out the roof so to have the optimal layout decided upfront. Next, I used a cold morning frost to mark the location of the roof rafts under the shingles. I did the panel mounting myself with the help of my son.

Aiming for maximum self-consumption means we need the infrastructure to utilize on spot or store the available PV excess in some form. Some popular options are using battery storage, heating hot water in a hot water cylinder, or charging an EV.
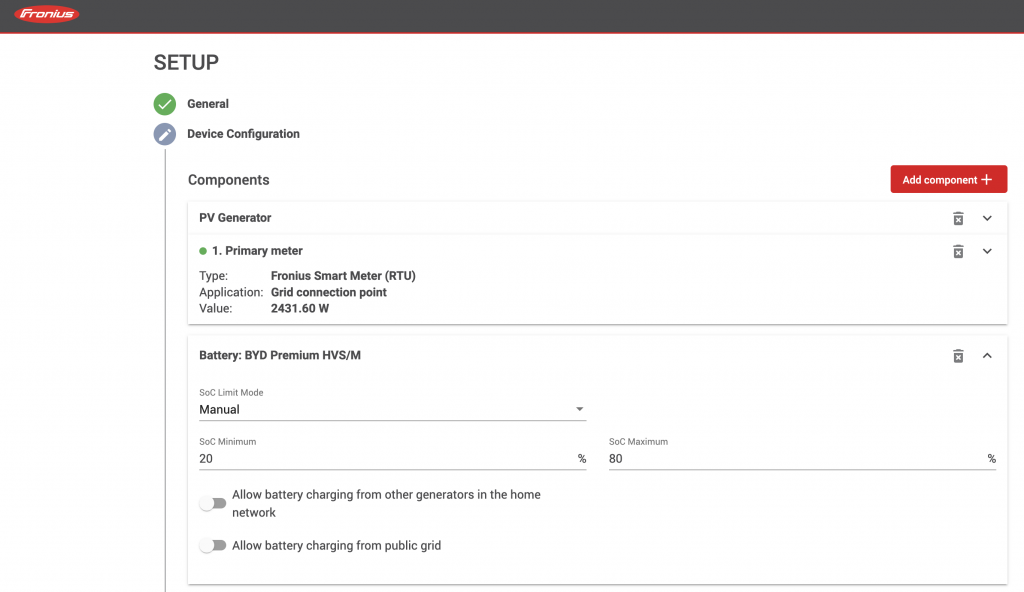
A compatible battery for the Fronius GEN24 Primo 6.0 Plus is the BYD HVS/HVM series. Those are high-quality LiFePO4 batteries from a reputable manufacturer that is also an EV car maker. I chose the HVS 7.68kWh variant, and plan to use it in the 20%-80% range, i.e. 60% Depth of Discharge (DoD) for longevity.


That will mean we only use 7.68*60%=4.6kWh per cycle. The default setting is 5%-100% e.g. 95% DoD, but I trust these settings are not ideal for the LiFePO4 chemistry. Let me know your experience/recommendation in the comments section. The warranty states a minimum guaranteed throughput energy of 23.12MWh or more precisely “BYD warrants that the Product will (i) retain sixty percent (60%) of its Usable Energy for ten (10) years from the Warranty Start Date; or (ii) reach the Minimum Throughput Energy, whichever comes first, on the condition that the Product is operated under a normal use followed by the manual provided by BYD”. I suppose with good care, the battery will last 12-14 years. The inverter allows configuration of maximum and minimum charge/discharge power schedules, so I would be able to configure time slots where I would like not to discharge the battery, for example at night, when the tariff is cheap anyway.
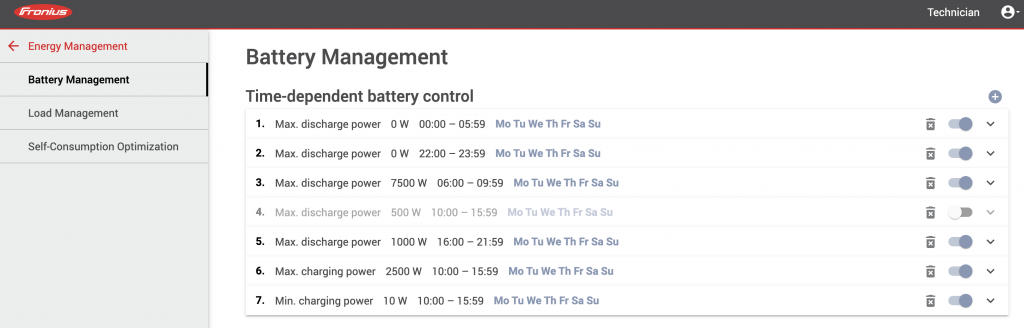
Another good feature is the configurable minimum/maximum State of Charge (SoC) limits, allowing for the 20%-80% DoD configuration. Should the weather forecast say that storms are likely, one could move the raise the lower SoC limit to say 60% and therefore hold a reserve charge in case of power disruption.
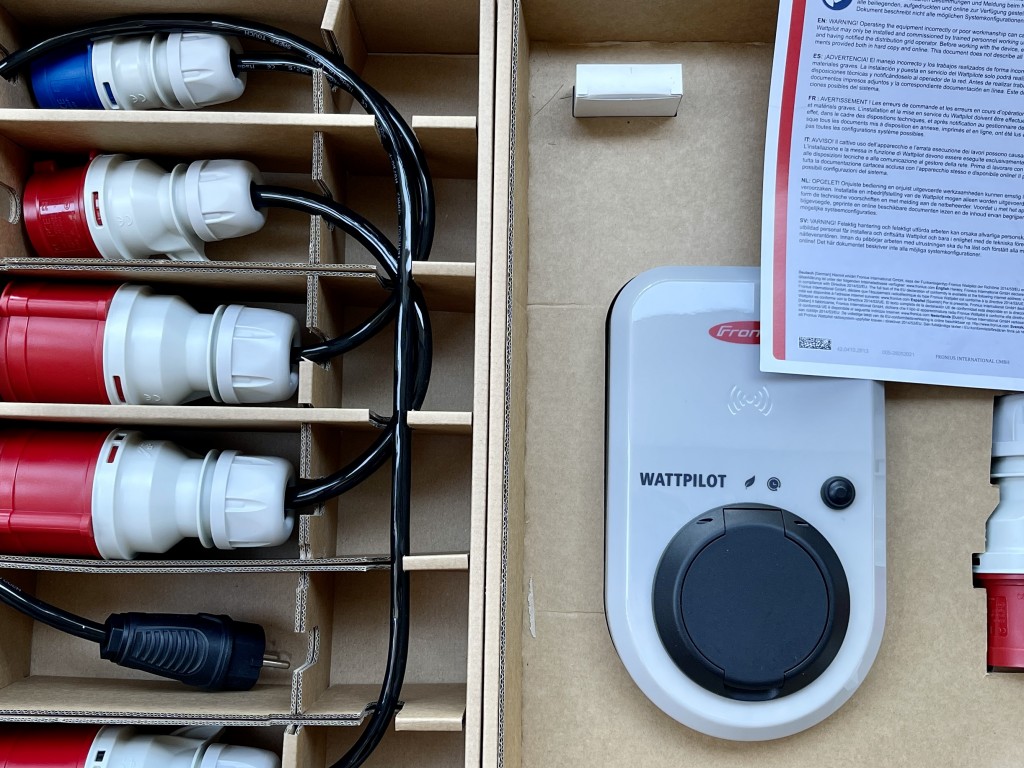
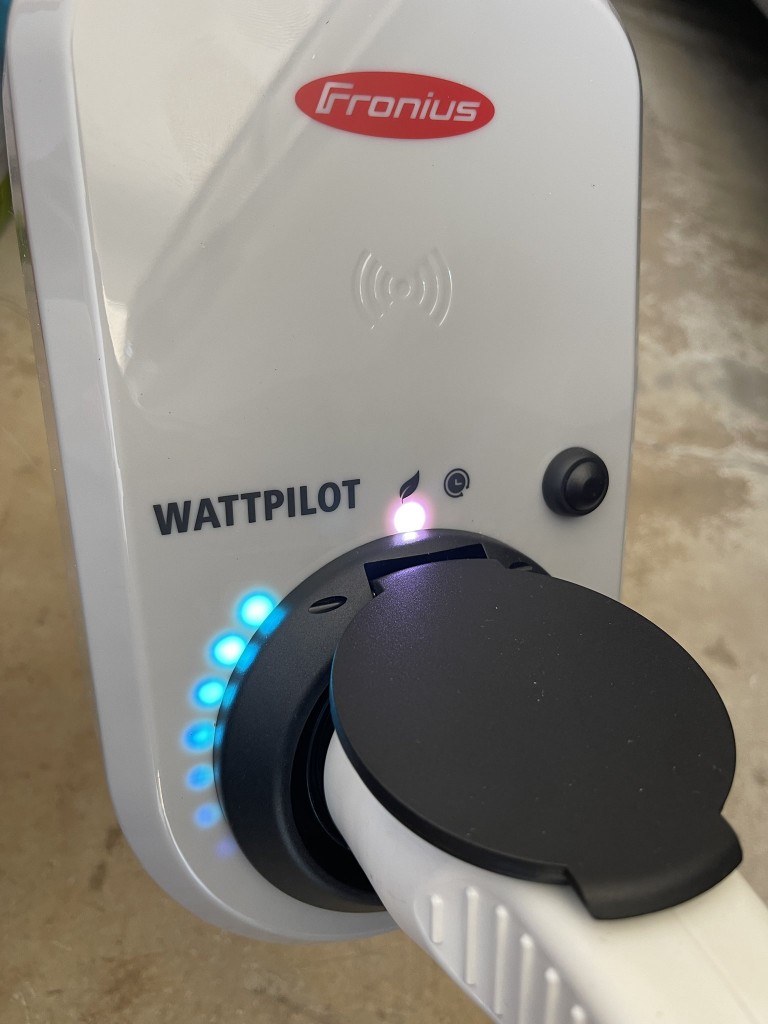
Charging an EV with PV excess is possible with many EV chargers, but we need one that works in a zero feed-in configuration. We have a single-phase installation, therefore can only utilize 7.4kWh max charging power (32A). This is sufficient for home charging, a two-hour charge cycle at full power will mean a 100km range, assuming 15kWh/100km vehicle consumption. The EV charger must be capable of charging on PV excess but also topping up, if needed, on the night tariff before the morning commute trip. I chose the Fronius Wattpilot 22J for EV charging that fully supports these functions and integrates into the Fronius ecosystem seamlessly.

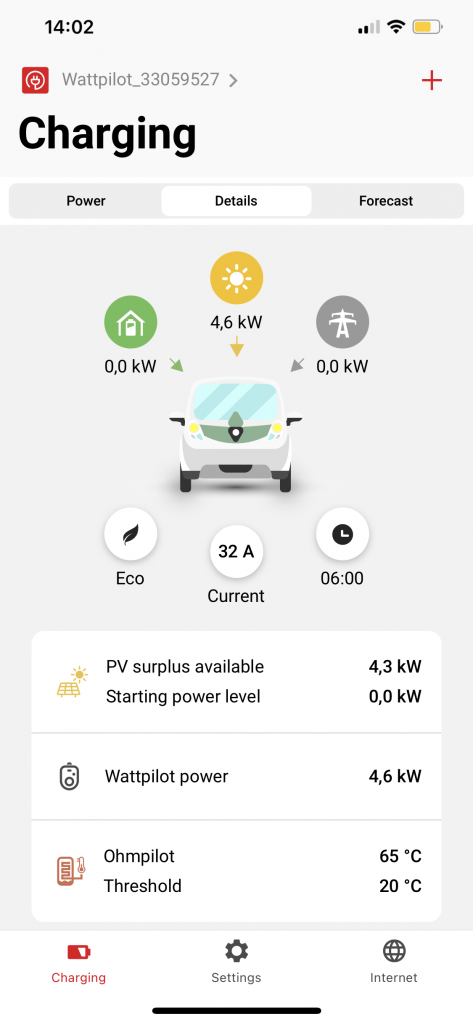
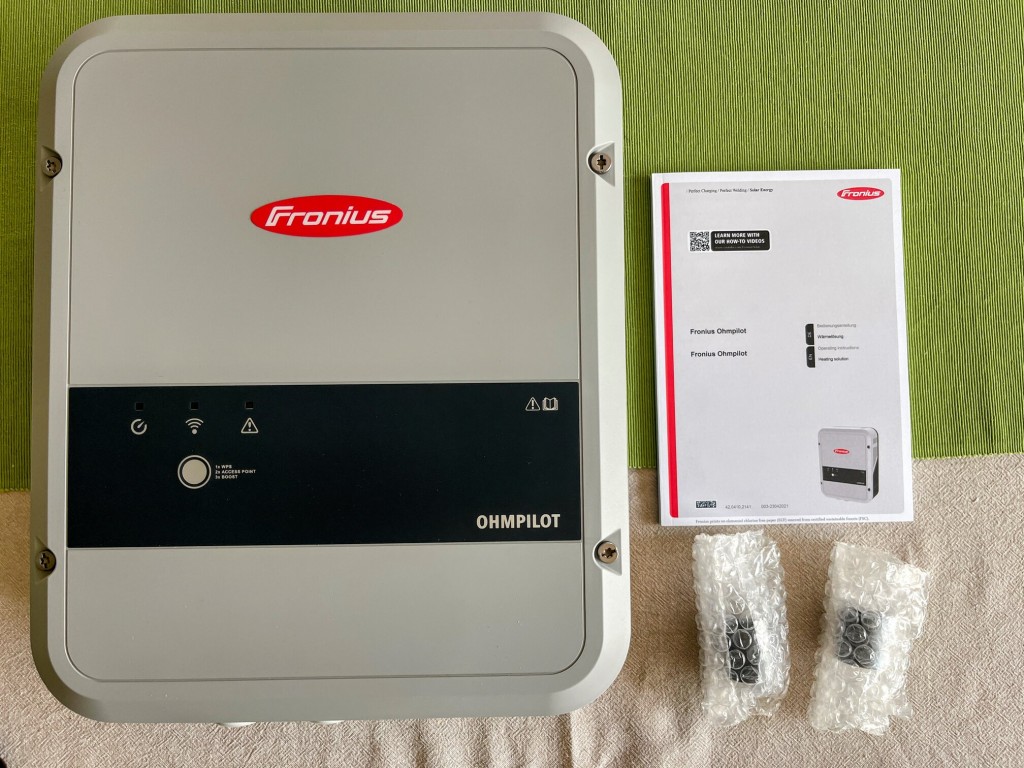
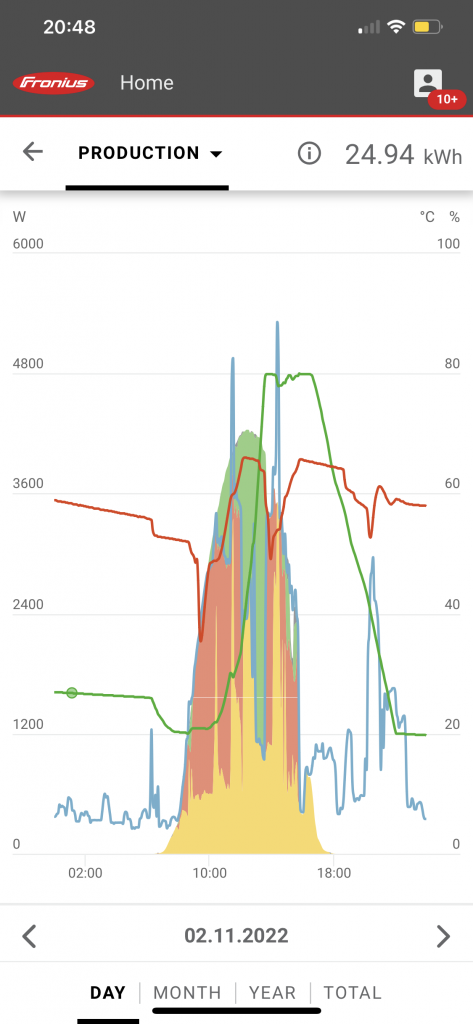
Using excess PV production to heat water in a hot water cylinder is a common way to increase self-consumption. Using an online water heating calculator, you can see that a let’s say 150l hot water cylinder with starting temperature of 30°C and a target temperature of 60°C can roughly store 5.24kWh of energy. For this to work efficiently and only use PV excess, phase angle control of the hot water cylinder heater element is needed. I chose the Fronius Ohmpilot for the purpose, a quality product with many available configurations. The screenshot below illustrates in an orange-ish color how the excess PV production is diverted to our hot water cylinder. Green-ish indicates PV excess being diverted to the battery.
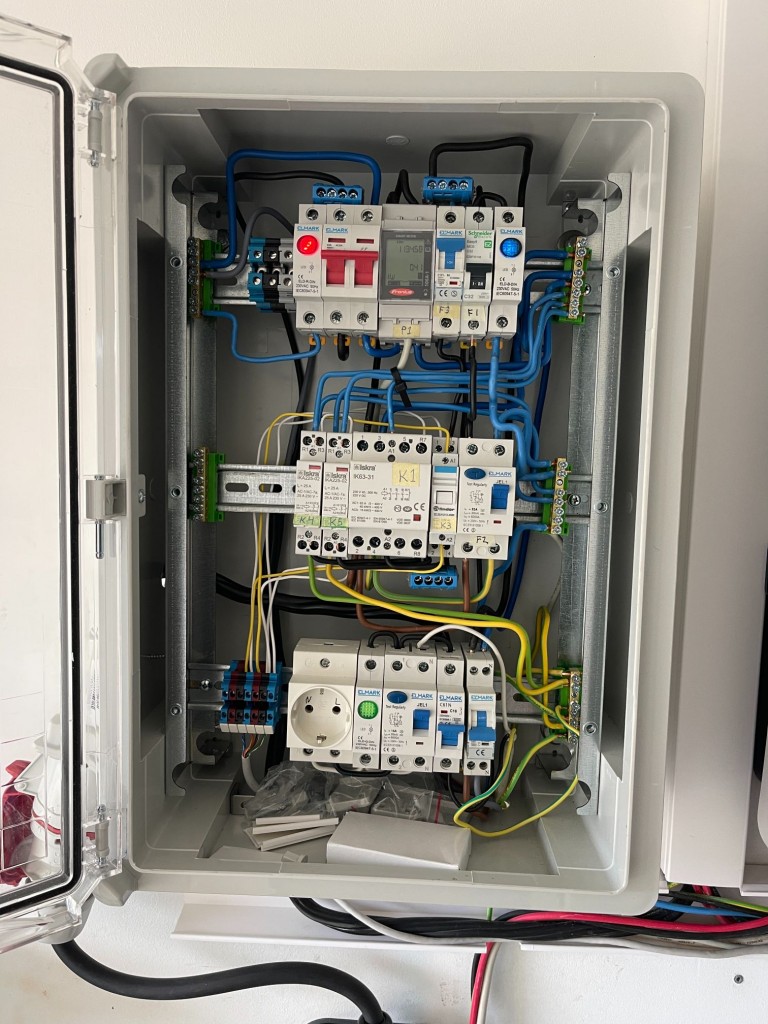
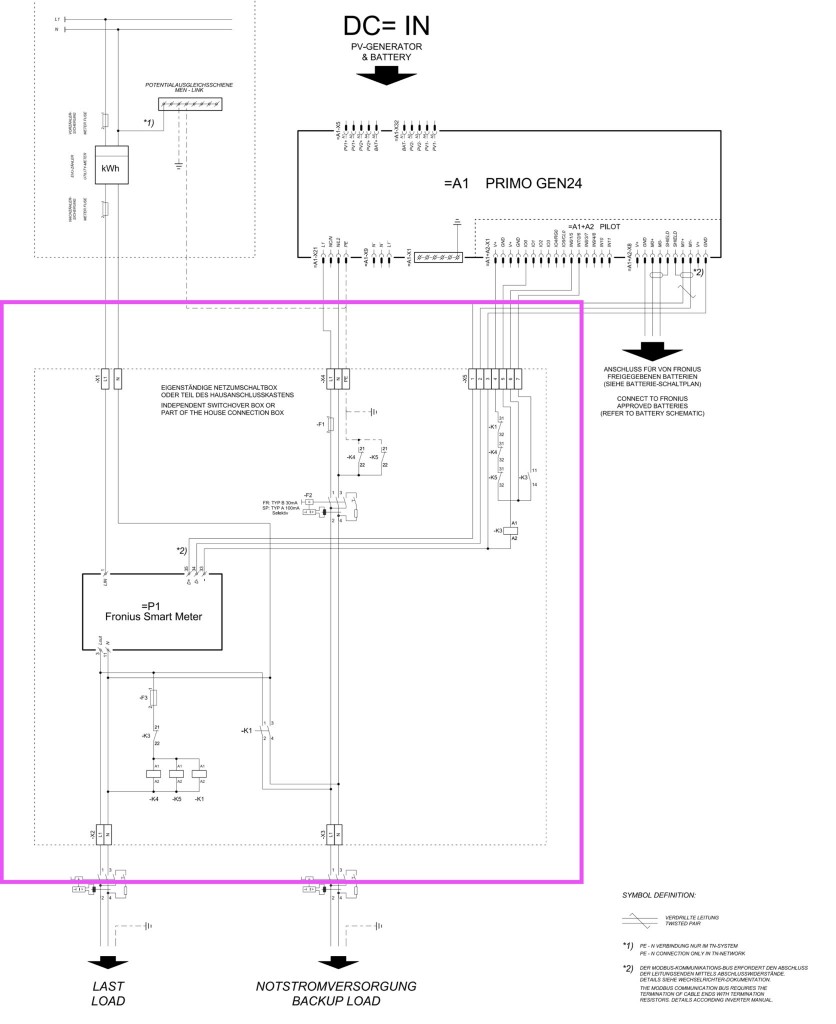
I implemented the DIY emergency power switchover box, in accordance with the recommended solution provided in the technical specifications of the Fronius GEN24 Primo inverter. The purpose of this component is to physically disconnect the house’s electrical network from the public grid during power failures, enabling the inverter to operate in “islanded” mode, utilizing available PV and battery capacity without a grid connection. Upon detection of stable grid power, the inverter initiates a 120-second grid quality monitoring period before switching back to grid-tie operation. I sourced components for the switchover box over the course of a month and completed the build in approximately a week of evening work. Despite having no previous experience building electrical distribution boxes, the build was successful on the first attempt. I tested all connections at maximum load and used an IR camera to check for loose connections that may heat up, but none were detected.

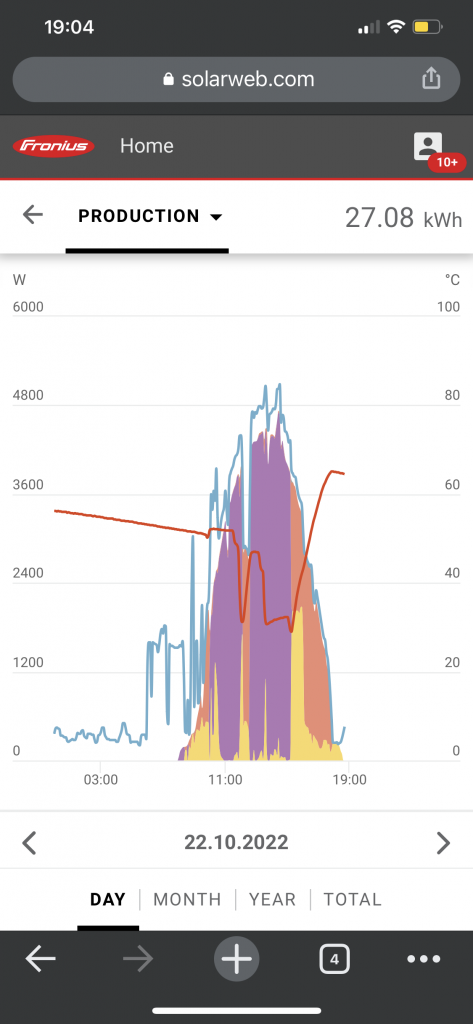
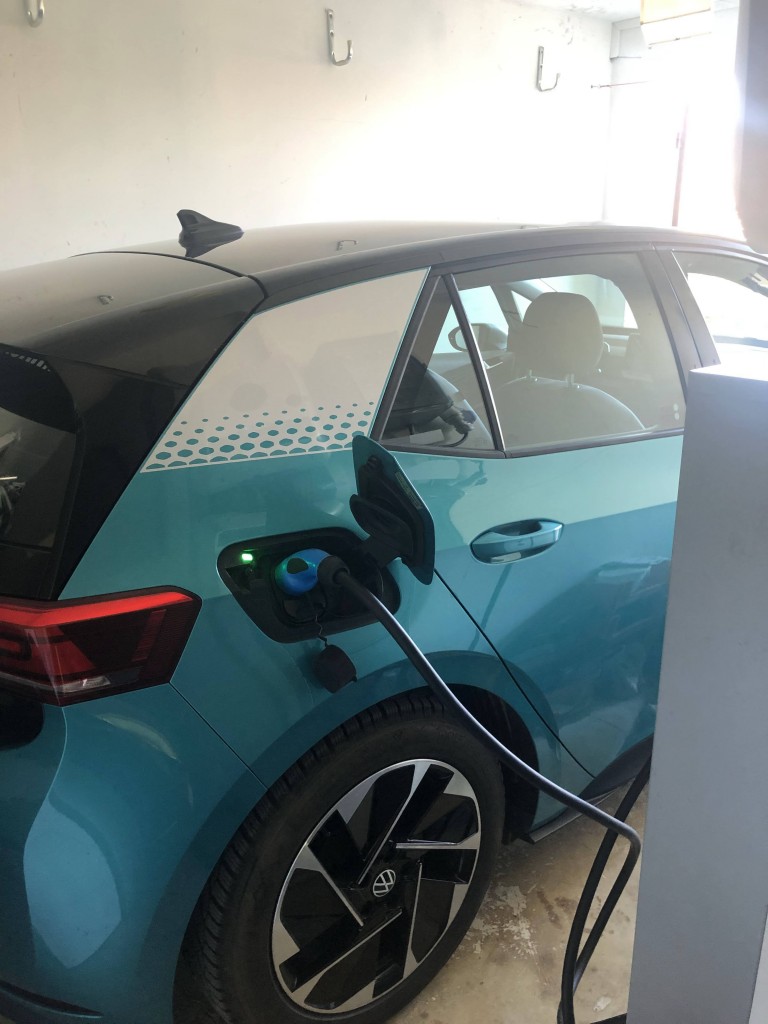
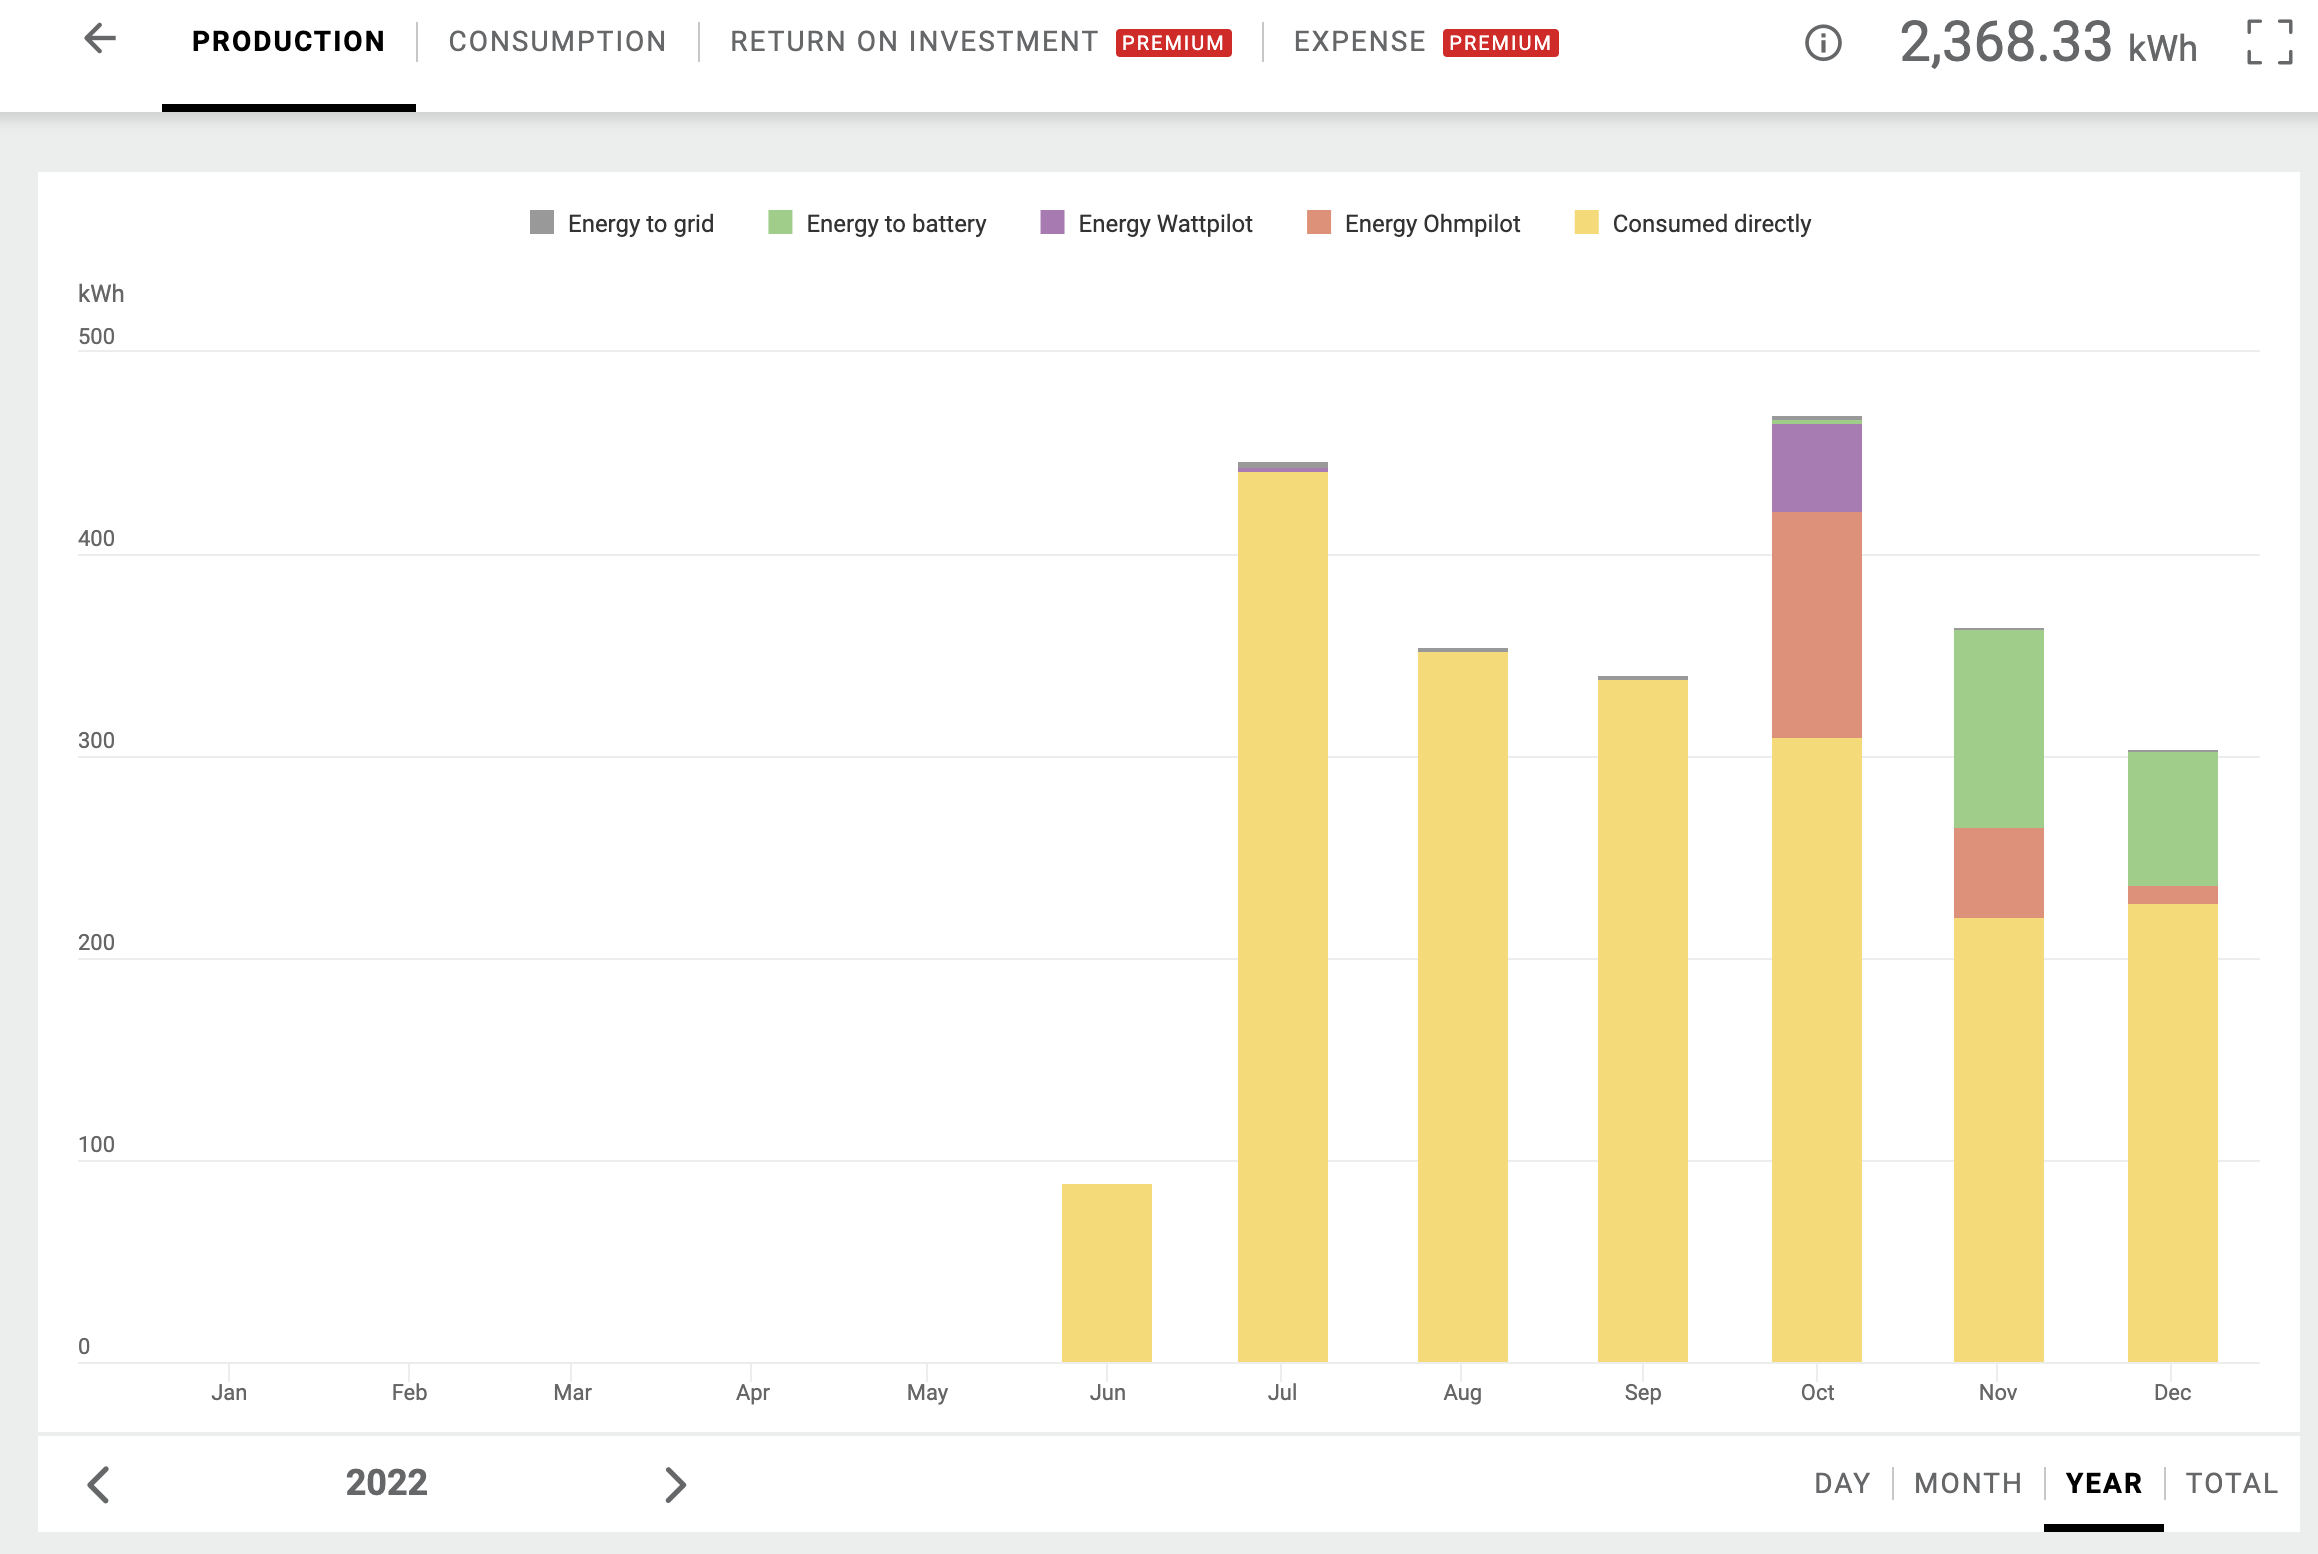
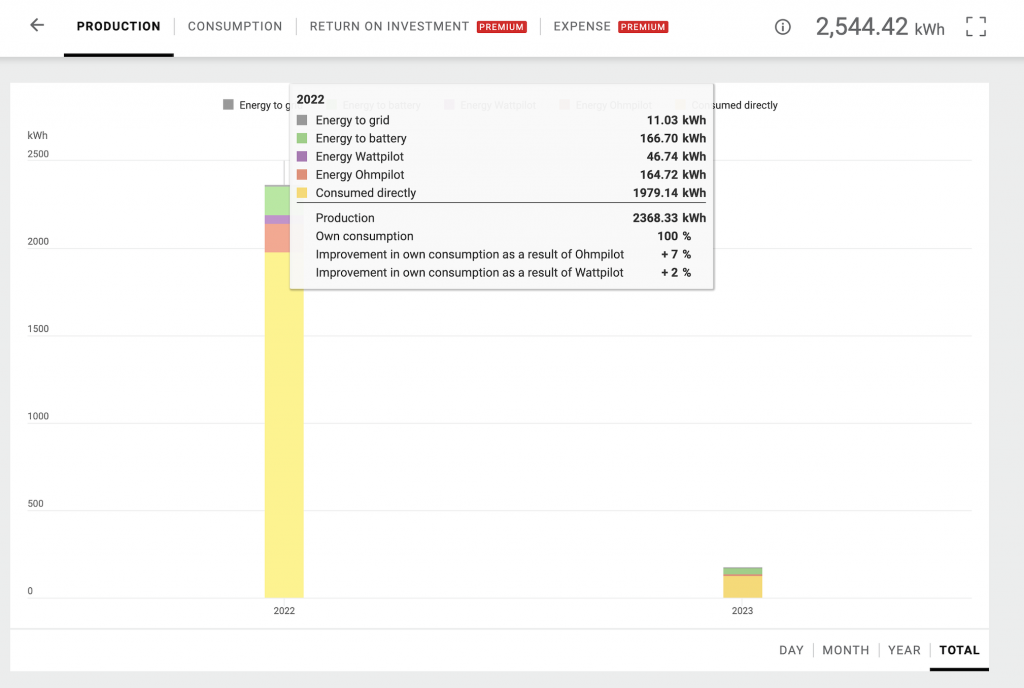
The following are screenshots of our solar production statistics from Fronius’s solarweb portal. The system was commissioned in late June 2022 and initially did not include a battery, PV-to-hot water cylinder diverter, or EV charger. As a result, there was strong underutilization of the system during the months of July to September due to the lack of self-consumption optimization components and the zero grid feed-in configuration. Although we currently do not own an EV, the system is designed to be capable of providing “free” daytime EV charging during the period of May to October. The purple-ish bars on the middle screenshot (October 2022) demonstrate charging a rented VW ID3 with excess PV production. We were able to fully charge the vehicle and complete our daily commute of approximately 60km without purchasing any energy from the grid.

The planning, sourcing, installation, and commissioning of the project took over 8 months to complete. The decision to undertake a DIY installation was driven by cost savings, but also provided a valuable learning experience. The total cost of the final project was approximately 14.5K EUR. It is open to interpretation whether the investment was worth it or not. I welcome feedback on this matter in the comments section.